You’re not the only one that has opened the closet door and been filled with frustration. One of the most frequently complained about storage issues in the home in most of the United States is disorganized, overcrowded closets, and in most instances, the cure is easier than you think. The right closet organizer shelves can make an unorganized and cramped space more functional, beautiful and stress-free.
From the smallest of reach-in closets in a starter home to the all-out walk-in wardrobe remodeling, this guide will cover all the basics – what types of shelving to look for, and the pros and cons of a DIY vs a professional custom installation. Once you read this, you’ll know which is successful, which isn’t, and how to maximize the amount of storage you have for every square inch.
Why Closet Organizer Shelves Make Such a Big Difference
Most standard closets come with a single shelf and a hanging rod. That’s it. It was never designed for the way modern households actually live with shoes stacked on the floor, sweaters stuffed into awkward corners, and belts draped over anything that will hold them.
Adding structured closet organizer shelves changes the entire equation. Here’s why they matter so much:
- They maximize vertical space. Most closets are taller than they are wide. Proper shelving stacks storage all the way to the ceiling, turning dead air into usable real estate.
- They bring order to chaos. When everything has a designated spot, getting dressed in the morning takes minutes, not twenty.
- They increase home value. Organized closet systems are consistently cited by real estate agents as a feature buyers notice and appreciate.
- They reduce decision fatigue. You can see everything at a glance no more digging through piles to find the other shoe.
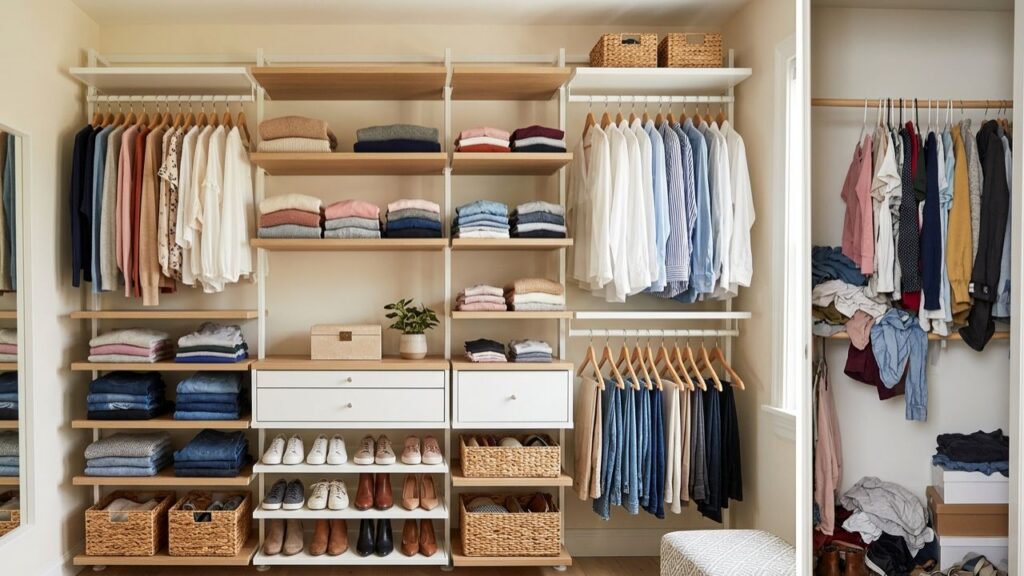
The best closet shelving systems aren’t just functional, either. Done right, they can look genuinely beautiful a well-organized walk-in closet with custom finishes feels more like a boutique dressing room than a storage area.
Types of Closet Organizer Shelves: Finding What Fits Your Space
But before getting involved in installation or designing, one should learn the primary categories of shelving solutions in the present times.
Wire Shelving Systems
Wire shelves are the least expensive and are most available. They are light, permeable (good for eliminating odors), and can be purchased at home improvement centers. The downside? They bend when they’re carrying a heavy load, shoes can drop through the cracks, and the aesthetic is quite functional, which isn’t necessary in every house.
Wire systems are good for utility closets, laundry rooms or rentals where budget is a key consideration.
Laminate and Melamine Shelf Systems
The middle, sweet, zone is for most homeowners. Laminate particleboard or MDF Shelves are durable, available in a variety of colors and finishes and can be customized to fit almost any space. A lot of the mod systems you’ll see at larger stores are in this category.
These make an ideal addition to reach-in closets, children’s rooms, and closet storage in bedrooms, where a clean and sleek appearance is desirable, but not necessarily costly.
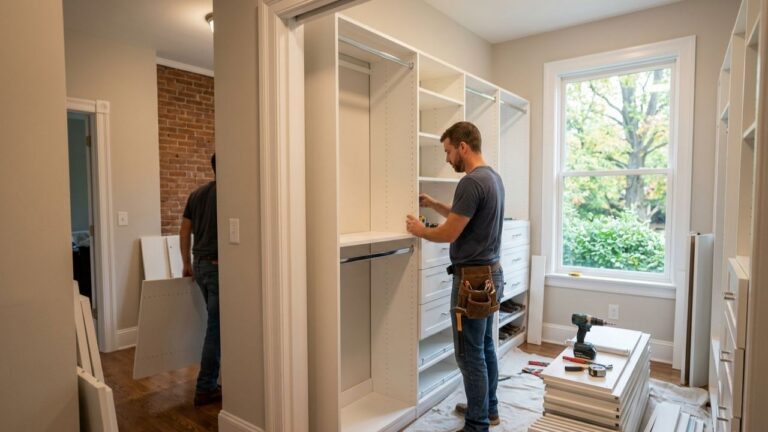
Built-In Closet Shelves
The built-in closet shelves are a big improvement over the basic models and make a statement. Built-ins are securely attached to the walls and designed to fit your specific space requirements, while freestanding or modular systems are not. They look like an architectural element of the room and not just stocked furniture.
The built-in may be made of solid wood, plywood, MDF or a mixture of materials. They generally come with such features as:
Adjustable shelf heights
- Integrated hanging rods (double or single height).
- Shoe racks and cubbies.
- Pull-out drawers and hampers
- Crown molding and trims that coordinate with your interior design of the home.
The result is a closet that looks as though it belonged there all along and it did!
Custom Closet Shelves
Custom closet shelves are built-ins, but with a twist. Instead of buying a pre-existing solution, a custom solution is created from scratch to meet your wardrobe, lifestyle and space needs.
A professional designer will help you figure out how many pairs you have, the space you need for long dresses, folded sweaters, space for a safe, and where the laundry basket will fit in with the rest of your home, and what finish would complement it best. The result is a highly novel storage solution which none of the commercially available options can offer.
Custom closet shelves are the best for master bedroom walk-ins, luxury homes and anyone who wants to have their closet exactly the way they want.
How to Build Closet Shelves: A DIY Approach
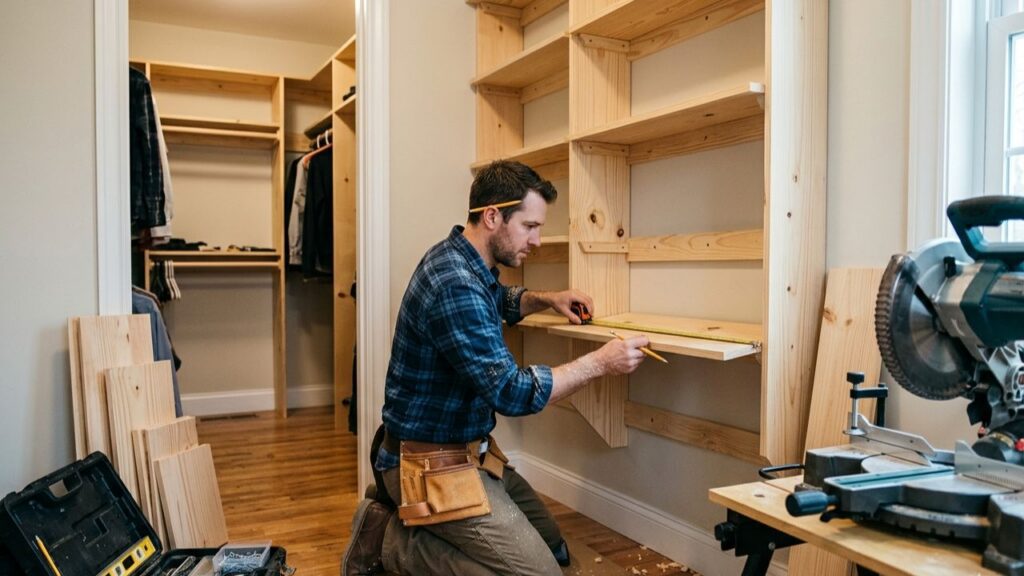
For the hands-on homeowner, building your own closet shelves is entirely achievable. It’s a rewarding weekend project that can save money though it does require careful planning, the right tools, and some basic carpentry skills.
Here’s a practical overview of the process:
Step 1: Measure Everything Twice
Start by measuring the full height, width, and depth of your closet. Note the location of electrical outlets, light fixtures, and any irregularities in the walls. Sketch a rough floor plan and decide where you want hanging sections, shelves, and any drawers or cubbies.
Step 2: Choose Your Materials
For a solid DIY build, ¾-inch plywood or MDF is the most popular choice. Plywood is stronger and holds screws better; MDF takes paint and finish more smoothly. If you plan to use a natural wood look, maple or birch plywood with a veneer edge is an attractive option.
Step 3: Cut and Prepare Your Pieces
Using your measurements, cut shelves, vertical dividers, and any side panels to size. Sand all edges smooth, apply edge banding if you’re using plywood, and pre-drill holes to prevent splitting.
Step 4: Locate and Mark Your Wall Studs
Before any fastening begins, use a stud finder to locate the studs in your closet walls. Every shelf support or cleat that bears significant weight should be anchored into a stud. Drywall anchors alone are not sufficient for heavy loads.
Step 5: Install the Ledger Boards and Cleats
Ledger boards (horizontal supports attached to the wall) and cleats are what keep your shelves level and sturdy. Attach them at your desired shelf heights using 3-inch wood screws driven into studs.
Step 6: Set the Shelves and Add Finishing Touches
Rest or fasten your shelves onto the cleats, check for level, and secure them. Install hanging rods using proper rod brackets rated for the expected weight. Finish with paint, trim, or decorative molding as desired.
Done carefully, a DIY closet build can look remarkably professional. That said, the process is time-intensive and unforgiving of measurement errors one wall that’s slightly out of plumb can throw off an entire design.
How to Install Closet Shelves: Key Tips for Success
Whether you’re installing a purchased modular system or setting up the DIY build described above, a few installation principles apply universally.
- Plan before you purchase. The single biggest mistake homeowners make is buying shelving components before fully thinking through the layout. Map out your entire design including where clothes will hang, where shoes will go, and how you’ll handle folded items before spending a dollar.
- Don’t skip the stud finder. Shelves loaded with clothing, shoes, and accessories can weigh hundreds of pounds. Anchoring into drywall without hitting studs is a recipe for a collapsed shelf and potential wall damage.
- Use a level constantly. An off-level shelf is visually irritating and functionally problematic. Check level at every stage of installation — not just at the end.
- Account for hanging rod clearance. Standard double-hang sections need about 40 inches of vertical clearance per rod. Single-hang sections for long dresses or coats need at least 66–72 inches. Plan these zones before any cuts are made.
- Leave room for adjustability. If you’re drilling shelf pin holes into vertical panels, drill a full column of holes at 1¼-inch intervals rather than just the spots you think you’ll use. Your needs will change over time, and adjustable shelves are far more valuable than fixed ones.
Don’t forget lighting. Even the most perfectly organized closet is frustrating in the dark. Plan for LED strip lighting under shelves or overhead fixtures early in the process retrofitting lighting afterward is always harder.
Built-In Closet Shelves vs. Modular Systems: Which Is Right for You?
This is the question most homeowners wrestle with, and the honest answer is: it depends on your priorities.
| Factor | Modular System | Built-In Custom Shelves |
|---|---|---|
| Cost | Lower upfront | Higher upfront, long-term value |
| Flexibility | Can be reconfigured or removed | Permanent installation |
| Look | Furniture-like | Architectural, seamless |
| Fit | Approximate | Exact to your space |
| Installation | DIY-friendly | Usually professional |
| Home Value Impact | Minimal | Significant |
For renters or those on tight budgets, modular systems are the smart play. For homeowners who plan to stay in their home and want something that genuinely elevates the space, built-in closet shelves deliver a level of polish and functionality that modular products simply can’t match.
What to Expect from a Professional Custom Closet Installation

If you’ve decided that a professionally installed custom closet shelves system is the right move, here’s what the process typically looks like when you work with an experienced provider like Custom Closets (custom-closets.us):
1. In-Home Consultation A designer visits your home, measures your closet, and learns about your lifestyle and storage habits. This is where you discuss finishes, features, and budget.
2. Design Presentation Using 3D design software, the company presents a visual rendering of your proposed closet before anything is built. You can see exactly what you’re getting and request adjustments.
3. Fabrication Your custom components are built to spec in a workshop or fabrication facility, ensuring precise cuts and consistent quality.
4. Professional Installation Trained installers handle everything anchoring, leveling, fitting, and finishing. Most custom closet installations are completed in a single day.
5. Final Walkthrough Before leaving, the installation team walks you through every feature, makes any final adjustments, and ensures you’re fully satisfied.
The difference between a well-installed custom system and a DIY build isn’t just cosmetic it’s in the details. Perfectly flush corners. Doors that close without binding. Shelves that don’t flex. Hardware that operates smoothly for years.
Closet Shelving Materials: What Lasts and What Doesn’t
Not all shelving materials age equally. Here’s a practical breakdown:
- Solid wood: Beautiful and durable, but expensive and can warp in high-humidity environments. Best for accent pieces and visible surfaces.
- Plywood: Strong, stable, and screws hold well. A good choice for shelf boxes and structural components.
- MDF (Medium-Density Fiberboard): Smooth, paintable, and affordable. Heavier than plywood and less resistant to moisture keep it away from damp areas.
- Melamine-coated particleboard: The industry standard for most custom and semi-custom closet systems. Durable, easy to clean, and available in dozens of colors and finishes. Holds up well under normal use.
- Wire/chrome: Durable and affordable, but lacks the visual warmth of wood-based materials. Best for utility spaces.
For most bedroom closets, a melamine-coated system either installed professionally or assembled from quality modular components offers the best balance of durability, aesthetics, and cost.
Common Closet Shelving Mistakes to Avoid
Even experienced DIYers and well-meaning homeowners fall into these traps:
- Overloading a single shelf zone: Distribute weight across multiple shelf levels rather than stacking everything in one area.
- Ignoring depth variations: A shelf for shoes doesn’t need the same depth as one for folded sweaters. Varying shelf depths improves both function and space efficiency.
- Not accounting for the door swing: In smaller walk-ins, shelves placed too close to the door create a constant obstacle. Leave at least 18–24 inches of clearance.
- Forgetting seasonal storage: High shelves near the ceiling are perfect for bins of off-season clothing design these zones in from the start.
- Buying cheap hardware: Drawer slides, hinges, and rod brackets that fail after a year are a false economy. Invest in quality hardware upfront.
Conclusion
A chaotic closet doesn’t have to be permanent. With the right closet organizer shelves whether you go the DIY route, opt for a modular system, or invest in fully custom closet shelves you can turn your storage space into something that genuinely works for your life.
The key takeaways from this guide:
- Wire systems are affordable but limited in aesthetics and durability.
- Modular laminate systems offer a solid mid-range option for most closets.
- Built-in closet shelves deliver a seamless, architectural look that adds real value.
- Custom closet shelves are the highest-quality solution designed specifically for you.
- Whether you’re tackling how to build closet shelves yourself or hiring a professional to handle how to install closet shelves, careful planning is the foundation of every successful project.
Ready to transform your closet from a source of stress into a space you actually enjoy? The team at Custom Closets specializes in designing and installing beautiful, functional storage systems for homes across Kentuckiana. Browse their gallery of completed projects, explore their full range of services, and get in touch to schedule a free in-home design consultation. Your dream closet is closer than you think.
FAQs
For most homes, melamine-coated MDF or particleboard is the most practical choice it’s durable, easy to clean, and available in many finishes. Plywood is a better choice if you need structural strength or plan to paint.
Standard closet shelves are 12 inches deep for most items. Shoe shelves can be shallower at 10 inches, while shelves intended for folded sweaters or bins work best at 14–16 inches.
This depends entirely on the material and how the shelves are supported. Properly anchored ¾-inch plywood shelves can hold 50+ pounds per linear foot. Wire shelves are typically rated for 25–35 lbs per linear foot. Always check manufacturer specifications and anchor into wall studs.
Yes, with the right tools and careful planning. DIY closet shelving is one of the more accessible home improvement projects. That said, custom or built-in systems typically benefit from professional installation for a seamless, high-quality result.
A basic modular system in a reach-in closet can be installed in 2–4 hours. A full custom walk-in closet professionally installed typically takes one full day.