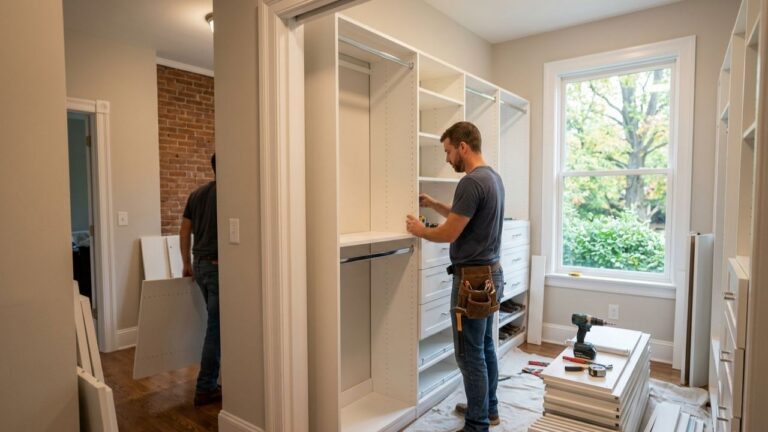
If you’re finding yourself putting your clothes away in the morning like you’re playing Jenga, it may be time to take a closer look at your closet and your storage problems. One of the best weekend projects that any homeowner can do is install closet shelves, it’s simple, cost effective and it will give you a great reward every single day.
Shelves can take the place of dead space in a cramped reach-in closet as well as a highly functional and organized system in the dream walk-in closet. And the best part? It doesn’t require a contractor to do. Follow this step-by-step guide and with the proper tools and a bit of planning, you can construct closet shelves that look like a pro did it.
This guide will help you plan your layout and select materials, install brackets and level your shelves. We’ll also be discussing when it is appropriate to invest in custom closet shelves and when it is possible to achieve that high-end, built-in closet shelves look, even on a DIY budget.
Why Upgrading Your Closet Shelving Is Worth the Effort
Before we dive into the how-to, let’s talk about the why. Many homeowners live with the original builder-grade closet rod and single shelf for years sometimes decades without realizing how much storage potential they’re leaving on the table.
Upgrading to a properly installed shelf system delivers real benefits:
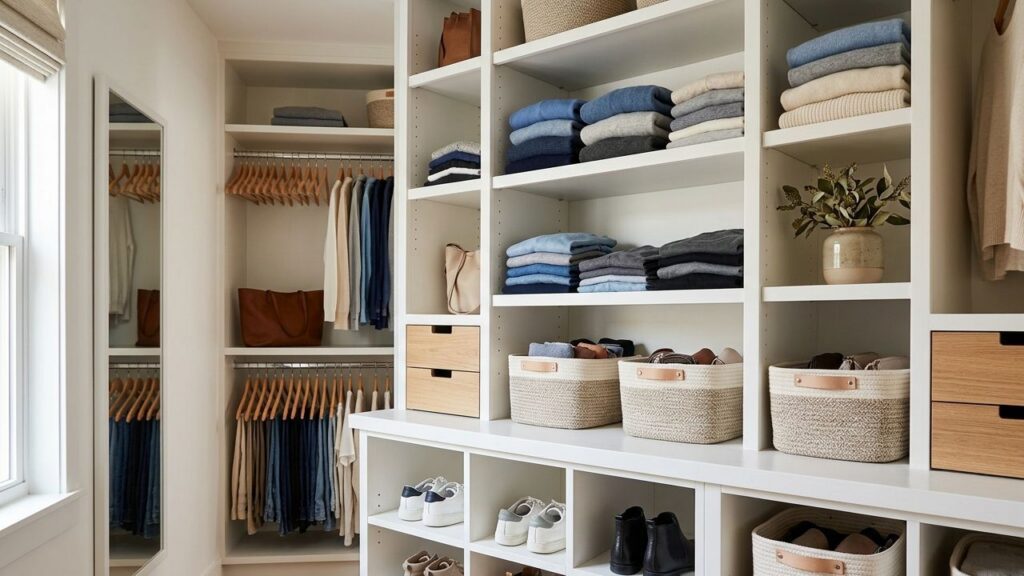
- More usable space: Stacked shelving can triple the storage capacity of a standard closet.
- Better organization: Designated zones for shoes, folded items, hanging clothes, and accessories reduce clutter dramatically.
- Higher home value: Custom closet systems are a known selling point for buyers in 2026’s competitive housing market.
- Reduced daily stress: An organized closet means faster mornings and fewer “I can’t find anything” moments.
The difference between a chaotic closet and a calm one often comes down to just one project: installing shelves the right way.
Step 1: Plan Your Closet Layout Before Touching a Single Screw
Great closet shelving starts not with a drill, but with a pencil and a measuring tape. Rushing into installation without a solid plan is the number-one mistake DIYers make.
Measure Everything (Twice)
Start by measuring the full dimensions of your closet:
- Width of each wall
- Height from floor to ceiling
- Depth from the back wall to the door frame
Standard closet shelves are typically 12 inches deep for folded items and 16 to 20 inches deep for hanging clothes. Note the location of any existing outlets, light fixtures, or HVAC vents that might affect placement.
Identify Your Storage Needs
Ask yourself:
- How much hanging space do you need? (Long dresses vs. folded shirts require different heights)
- Do you need shoe storage, drawer inserts, or space for bins?
- Is this a reach-in closet, a walk-in, or a wardrobe system?
Sketching a rough diagram on paper or using a free closet planning tool online helps you visualize the layout before committing. This is where you’ll decide between a basic shelf-and-rod system and something more elaborate like built in closet shelves with multiple zones.
Step 2: Choose the Right Materials for Your Closet Shelves
The various materials will impact the price, longevity, look, and the way you really put the shelves up. Let’s take a look at the most commonly used ones.
Melamine-Coated Particleboard
The most used material for making inexpensive closet shelves. It is available in most home improvement stores pre-cut, easy to use and comes in a variety of finishes (the most common being white for closets). One disadvantageous aspect is that it may sag over great distances when not supported by a center column.
Ideal for: On a budget builds, reach-in closets, first-time DIY.
Plywood
Plywood is more durable than particleboard, less apt to sag and is the preferred material for substantial custom closet shelving. Center bracket-free cabinets can be built up to 48″ or 36″ wide, depending on the quality of the cabinetry and the thickness of the ¾” cabinetry sheet. It can be painted or veneered for a clean and professional appearance.
Ideal for: Walk in closets, longer spans, high end construction.
Wire Shelving
Wire systems, such as Closet Maid or Rubbermaid, are light, permeable and easy to install. They do have a somewhat less attractive look than solid shelves, but are extremely practical for linen closets or utility storage.
Ideal for: Utility rooms, linen closets, fast installations.
Solid Wood
Solid wood (pine, oak, poplar) is the high quality option for truly built-in closet shelves that look like furniture. The price is the highest but it’s also the longest lasting and the most customizable.
Ideal for: Master closets, luxury construction, home with wood flooring.

Step 3: Gather Your Tools and Materials
Before installation day, make sure you have everything you need. Running to the hardware store mid-project kills momentum.
Tools You’ll Need
- Tape measure and pencil
- Level (a 4-foot level is ideal)
- Stud finder
- Drill with driver bits and a ¼-inch drill bit
- Circular saw or miter saw (if cutting shelves)
- Sandpaper (120 and 220 grit for wood edges)
- Safety glasses and hearing protection
Materials You’ll Need
- Shelf boards (cut to size or purchase pre-cut)
- Shelf brackets (standard L-brackets, or heavy-duty for longer spans)
- Wall anchors (if mounting between studs)
- Wood screws (1¼-inch for brackets into studs; 2½-inch or 3-inch for studs directly)
- A closet rod and rod brackets (if adding a hanging section)
- Optional: edge banding tape to finish exposed particleboard edges
Step 4: Locate Wall Studs and Mark Your Shelf Heights
This step is critical for safety and stability. A shelf mounted only into drywall without hitting a stud or using proper anchors will fail under weight.
Using a Stud Finder
Run your stud finder horizontally across the wall and mark stud locations with light pencil marks. In most homes, studs are 16 inches apart on center. Verify by tapping the wall (a solid thud indicates a stud; a hollow sound means drywall only).
Marking Shelf Heights
Use your level and tape measure to mark a horizontal line where each shelf will sit. Standard recommendations for a typical reach-in closet:
- Top shelf: 84 inches from the floor (great for seasonal items and bins)
- Second shelf: 40 to 42 inches (ideal for folded clothes)
- Bottom shelf or floor: Leave 12 to 15 inches for shoes or baskets
For double-hanging sections (two rows of clothes), place the upper rod at 80 to 82 inches and the lower rod at 40 to 42 inches, with no shelf in between.
Use a level to draw light guide lines across the wall at each height. These lines ensure your brackets are perfectly aligned and your shelves won’t slant.
Step 5: Install the Shelf Brackets
With your lines marked and studs located, it’s time to mount the hardware.
Standard L-Bracket Installation
- Hold the bracket against the wall with the horizontal arm pointing outward, aligning it with your shelf height line.
- Mark the screw hole locations on the wall.
- If the hole lands on a stud, drill a pilot hole and drive your screw directly.
- If there’s no stud, drill a hole for a toggle bolt or heavy-duty drywall anchor.
- Secure the bracket with screws and check that it’s level before tightening completely.
- Repeat for all brackets, spacing them no more than 24 inches apart (16 inches is better for heavy loads).
Using a Ledger Board (for a Built-In Look)
For a cleaner aesthetic that mimics custom closet shelves, install a horizontal ledger board (a 1×3 or 1×4 strip of wood) along the back wall at shelf height. Screw the ledger into studs, then rest the shelf on top of it. Add side brackets or support cleats on the side walls for a three-sided support system. This method is sturdier and gives shelves a “floating” appearance.
Step 6: Cut and Install Your Shelves
If your shelves aren’t pre-cut, now is the time to cut them to length.
Cutting Tips
- Use a circular saw with a fine-tooth blade for melamine and plywood to minimize chipping.
- Score the cut line with a utility knife first to prevent edge tearout.
- Smooth all cut edges with 120-grit sandpaper, then 220-grit.
- Apply iron-on edge banding to any exposed particleboard or plywood edges for a professional finish.
Setting the Shelves
Place each shelf on its brackets or ledger board. If the shelf is simply resting on brackets, you can leave it as-is for easy adjustment later. For permanent installations, secure from underneath with short screws driven up through the bracket into the shelf bottom.
Check level after placing each shelf. If it’s off, shim beneath a bracket or adjust the bracket position slightly.
Step 7: Install the Closet Rod (for Hanging Sections)
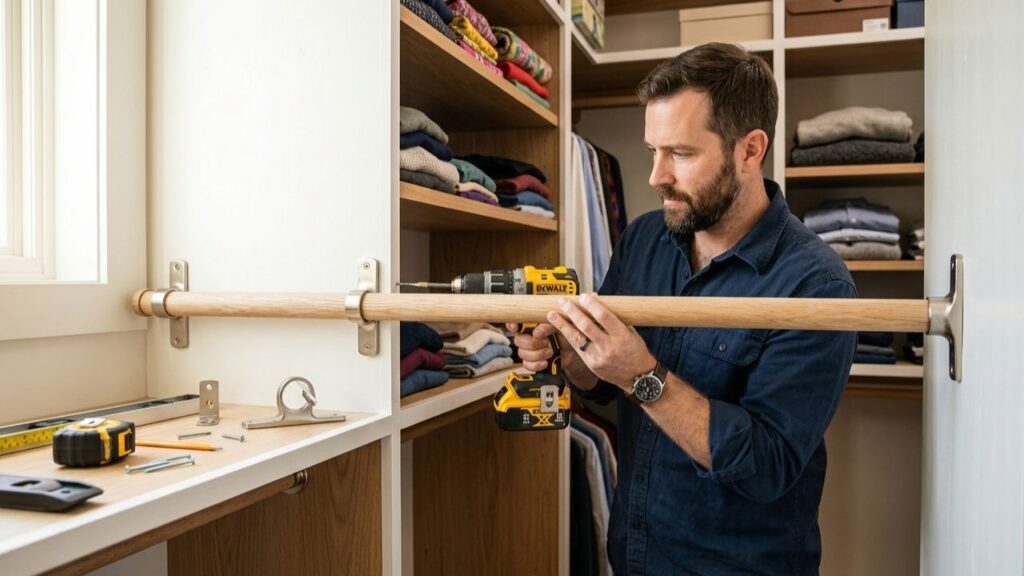
If your design includes a hanging area, install your closet rod last.
- Mount the rod brackets on opposing side walls at your desired height, making sure they’re level with each other.
- Insert the rod into both brackets and check that it sits securely.
- For spans over 48 inches, add a center support bracket hung from the shelf above to prevent the rod from bowing.
- Standard closet rods are 1¼ inches in diameter. Cut oval-rod styles (which resist sagging better) to length with a hacksaw if needed.
How to Build Closet Shelves for a Walk-In Closet
A walk-in closet opens up greater design options and some additional considerations. The way to do it:
Zone Your Space
Create distinct areas for his clothing, her clothing, shoes, accessories, and seasonal storage in the how to build closet Shelves. This will not allow the walk-in to turn into an even bigger version of that same crazy walk-in you began.
Use a Three-Wall System
To get the best storage, mount shelving on all three walls (back and both walls). Usually the back wall is used for folded items and accessories, while the side walls are good for hanging sections.
Consider Tower Units
Freestanding or built-in tower units (vertical columns of shelves) are excellent for utilizing vertical space between shelves. Between two hanging rods, a tower of 4 – 6 shelves creates a tremendous amount of folded storage.
When to Consider Professional Custom Closet Shelves
DIY closet installations are great for straightforward projects, but certain situations call for professional expertise:
- Irregular or non-standard closet shapes (angled ceilings, bump-outs, alcoves)
- High-end finishes like dovetail drawers, soft-close hardware, or specialty wood species
- Integrated lighting with wiring
- Large master closet systems with 20+ linear feet of shelving
A professional closet designer from a company like Custom Closets US can create a fully tailored system with precise measurements, premium materials, and installation that’s guaranteed. The investment often pays off in both daily functionality and home resale value.
Common Mistakes to Avoid When Installing Closet Shelves
Even experienced DIYers make these errors. Watch out for:
- Skipping the stud finder: Brackets in drywall alone will pull out under weight. Always hit studs or use proper anchors.
- Not checking for level: A shelf that looks “close enough” will drive you crazy over time. Use your level religiously.
- Underestimating weight loads: Books, shoes, and packed storage bins are heavy. Overengineer your bracket spacing rather than underdoing it.
- Ignoring depth variation: Shelves for shoes (10 inches) and shelves for folded sweaters (14 to 16 inches) have different optimal depths. One-size-fits-all shelving wastes space.
- Forgetting about doors: In reach-in closets, make sure shelves and hanging rods don’t interfere with the door swing or sliding track.
Conclusion
A great home improvement skill that you can learn is how to install closet shelves. These are just some of the steps you will be taking, from planning your layout and selecting materials, to hitting studs and leveling shelves, all leading up to a space that truly enhances your everyday life.
Whether you’re doing this all by yourself with the circular saw and a Saturday afternoon, or you’re thinking about the higher-end appearance of a built-in closet shelf using a professionally made product, you always want to begin with a quality plan and material that will suit you and your requirements.
If you are looking for something more than just a DIY level 2 or perhaps a more customized finish with no the guesswork, dive into the complete stock of custom closets US and tailor made storage solutions. They offer design knowledge and experience to all projects, from reach-in to luxury walk-in upgrades.
Having a dream closet doesn’t have to be out of reach. A space can be beautifully organized and operate as hard-working as you do with right approach.
FAQs
Most homeowners will start with ¾-inch melamine coated particleboard. It is inexpensive, readily available and simple to cut and fit. For greater resistance, or longer span without sagging, use ¾ inch plywood.
Do not use 3-sided support (back ledger board and two side support cleats) rather than exposed L-brackets. Use matching trim and paint all edges and inside of closet, to the same color as the shelves. This looks like closet shelves built in, even on a DIY budget.
Yes, but with some modifications. For very light shelves, removable adhesive anchors should be used, or consider using a freestanding shelf system that requires no wall drilling. When you do drill, make sure that you have a can of spackle for move out day.
Use thick material (at least 3/4 inch thick), and be sure to keep brackets 24 inches or less apart, and do not overstuff shelves. In longer spans, adding a center support or back ledger will have a significant effect in minimizing sag.
When your closet is of an unusual size, you are looking for high-quality materials or finishes, you and your space are considering integrating lighting or electricity, or you simply want a guaranteed result with a polished look, it’s time to hire a professional. A custom closet shelf company can create, fabricate and set up a system that is customized to match your space and lifestyle.